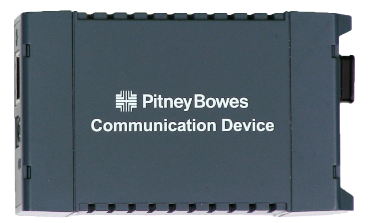
Troubleshooting the Communication Device on the mailstation series
Learn how to troubleshoot issues with your Communication Device on mailstation and mailstation2.
Products affected: mailstation™, mailstation2™
Issue
Alert: The USPS has discontinued all IBI meter technology, and many devices must be returned and withdrawn from service by the end of 2024. If your device is affected, new business rules will disrupt your mailing operation. Check Your Account to see if your device is affected and contact your Account Representative to migrate to a compliant solution.
Your mailstation™ or mailstation2™ does not connect when using the Communication Device.
Cause
The meter cannot communicate with the Pitney Bowes Data Center when connected through a Communication Device.
Resolution
Try your Communication Device troubleshooting solutions in this order:
Solution 2: Reset your Communication Device to factory default settings
If your Communication Device does not work, you may need to restore your Communication Device to the factory settings. Read through the instructions before you begin. Select a method for restoring your factory settings:
Power Cycle method:
Button method:
- Restart your meter and Communication Device
- Reset your Communication Device to factory default settings
- Reconfigure your Communication Device
- Try a different connection method
Solution 1: Restart your meter and Communication Device
- Unplug the power cord from the back of your meter.
- Unplug the USB cable from the back of your meter.
- Unplug the power cord from your Communication Device.
- If you have a wired connection, unplug the network cable from your Communication Device.
- Wait 30 seconds.
- Plug the network cable into your Communication Device. Make sure that the other end of the network cable is plugged into a working network router, switch, or wall jack.
- Plug the power cord into your Communication Device.
- Wait for an orange flashing LED (light) near the Communication Device's network jack.
- If the LED does not turn on, make sure that the Communication Device is properly plugged in to a working power source.
- If LED is red, either your network settings are blocking the connection, or the network cable is bad.
- Plug the USB cable into your meter.
- Plug the power cord into your meter.
- Check the network jack on your Communication Device once your meter returns to the Home screen.
- If the LED on the network jack flashes green, your connection works.
- If the LED does not flash green, go to the next solution.
Solution 2: Reset your Communication Device to factory default settings
If your Communication Device does not work, you may need to restore your Communication Device to the factory settings. Read through the instructions before you begin. Select a method for restoring your factory settings:
- Method A: Power Cycle method
- Method B: Button method.
Power Cycle method:
- Unplug the power cord from your Communication Device.
- Using a pen, press and hold in the small reset button on your Communication Device.
- While holding the reset button in, plug the power cord back into your Communication Device.
- Continue to hold the button in until the green LED lights up, then release. This takes about 10 seconds.
- After the green LED lights up, go back to the first solution and restart your meter and the Communication Device.
Button method:
- Turn on the Communication Device and make sure that the green and/or red LEDs are blinking.
- Use a pen to press and hold in the small reset button on the Communication Device until the LED turns green (about 2 seconds).
- After the green LED turns on, release the button.
- If the green LED turns off and the red LED turns on, the process was successful. A few seconds later, the red LED turns off as your Communication Device resets itself.
- If the LEDs start blinking again, the solution was not successful. Repeat Steps 1-3.
Solution 3: Reconfigure your Communication Device
- DHCP (Dynamic Host Configuration Protocol) on your network.
- Disconnect the USB cable from your meter.
- Download and run the Network Setup Software to verify and manually configure the network gateway.
- In addition to the DNS, you must specify the IP Address and Subnet mask.
Solution 4: Try a different connection method
- Install PC Meter Connect
- Go to your Downloads folder and double-click on your setup.exe file to start your installation.
- Follow the instructions to install your PC Meter Connect software.
UPDATED: September 25, 2024
