Pitney Bowes Smart Access Management® (SAM)
Find solutions
Install & Setup
Using Your Product
Fixing & Maintenance
Reporting, History & Accounting
Installation, Setting Up & Drivers
If you are installing the QL-820NWB label printer for the very first time, follow these instructions.
To download the PB Companion mobile app from the App Store, search pb companion.
If you are installing a Smart Access Management Desktop for the first time, follow these instructions.
To turn the Smart Access Management tablet on or off, follow these instructions.
If you are setting up your own tablet to use with the Pitney Bowes Kiosk app for the first time, follow these instructions.
Network & Connectivity
You can connect to a Wi-Fi network on the Smart Access Management tablet.
Pair your QL-820NWB label printer via Bluetooth with the Smart Access Management tablet to begin the visitor badge printing process.
The following URLs and IP addresses must be accessible in order for Smart Access Management to connect to the internet.
If you are going to use Single Sign-On (SSO) for PitneyShip Pro, PitneyShip Enterprise, PitneyTrack Asset, PitneyTrack Inbound, PitneyTrack Enterprise, PitneyLockers or Smart Access Management, you need to configure your Identity Provider (IdP) according to our guidelines.
Features & Settings
Locations are subsets of divisions, which are subdivisions of your enterprise. Each division can contain multiple locations.
You need to sign into the Smart Access Management web portal order to use the system.
You can configure Smart Access Management to integrate with Microsoft Entra ID. This was previously known as Azure Active Directory.
You can send customized email and SMS notifications to inform users when certain events occur.
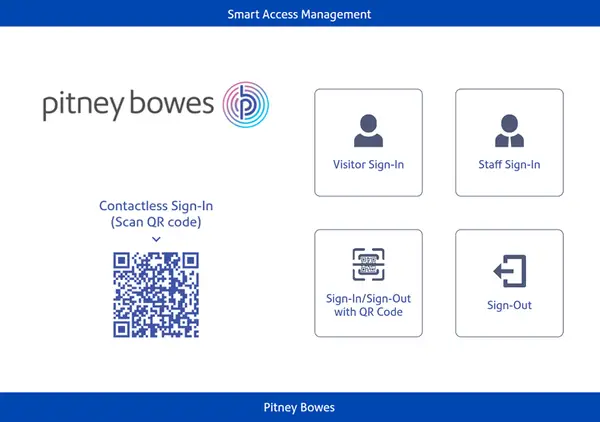
If you have received a pre-registration email, you can sign into the Smart Access Management kiosk using the QR code that was sent within the email.
You can use the Access Queue to upload and check submitted documents and also set expiration dates for pending sign in requests.
You can view the number of visitors and staff signed in at different sites and locations using the PB Companion mobile app.
You can use the PB Companion mobile app on your mobile phone to quickly sign in.
Divisions are subsets of your enterprise, which is the topmost level of your organization. Each division can contain multiple locations within it.
You can create different roles to define the tasks that users are allowed to perform. Each user is assigned a role.
You can configure the data retention policy to suit your companies policy in Smart Access Management.
You can enable or disable customized notifications to inform signed in visitors and staff when an evacuation order has begun.
You can send customized email and SMS notifications to inform users when certain events occur.
You can view the Access Queue to check submitted documents and set expiration dates for pending sign in requests.
If you need to pre-register or manually sign in visitors, you can configure this in the following workflow.
A staff member can pre-registor a visitor using the PB Companion mobile app. This helps if they cannot access the Smart Access Management website at that time.
If you make any changes to the Smart Access Management web portal that affect your tablet, you need to refresh the Kiosk app.
Customize a Kiosk layout to apply your preferences for kiosk screens.
View your profile to view your photo, status (signed in or out), contact details and visit duration.
You need to sign in in order to use the app. Sign out if you need to sign in with a different account.
If you have multiple sites, you can select the site that you want to use the PB Companion mobile app with.
Set up Tenant Onboarding if you have multiple companies using Smart Access Management at one site. You can sign into one device to allow access to the desired company.
You can use the reception bell to request assistance when using Smart Access Management.
You can add a kiosk workflow so that different types of visitors and staff can sign in and follow a unique workflow.
You can pre-register a visitor to speed up the sign in process or if you need them to supply certification before they arrive at your premises.
Follow these instructions to sign in a visitor to your premises.
You can add, edit, delete, import, and export users of the system as needed.
You can create different roles to define the tasks that users are allowed to perform. Each user is assigned a role.
The dashboard is the starting point for viewing visitor and staff sign-in and sign-out data for all your locations.
You can maintain staff contacts from Microsoft Entra.
You can add new contacts to the system as needed.
You can import new contacts to the Smart Access Management Address Book.
Administrators of enterprises can export a ZIP file of contacts from the system automatically on a fixed schedule to an SFTP server.
Network & Connectivity
You can connect to a Wi-Fi network on the Smart Access Management tablet.
Pair your QL-820NWB label printer via Bluetooth with the Smart Access Management tablet to begin the visitor badge printing process.
The following URLs and IP addresses must be accessible in order for Smart Access Management to connect to the internet.
If you are going to use Single Sign-On (SSO) for PitneyShip Pro, PitneyShip Enterprise, PitneyTrack Asset, PitneyTrack Inbound, PitneyTrack Enterprise, PitneyLockers or Smart Access Management, you need to configure your Identity Provider (IdP) according to our guidelines.
Errors & Troubleshooting
If the "Do not challenge me on this device again" option is not working or you get MFA prompts happening too often, you may need to adjust your browser settings.
If you do not receive the Welcome email, you can go to the signin page and use the "Forgot your password?" link to reset your password.
If you do not receive the email with the authentication code, it may be in your Spam or Junk folder, or your network may be blocking the emails.
There are several things that may cause issues when signing in.
If you received an email from Pitney Bowes with the subject "Action Needed: Your SSO Connection Will Expire Soon", the security certificate used for your Single Sign-On (SSO) connection is set to expire. Action is needed to update it.
Maintenance
Follow these instructions to load a label roll into the QL-820NWB label printer.
If you make any changes to the Smart Access Management web portal that affect your tablet, you need to refresh the Kiosk app.
Reporting, History & Accounting
Create an evacuation order to notify all signed in visitors and staff members to evacuate immediately. An active evacuation list will be created.
You can create an evacuation order to send an email, SMS message or both to staff and visitors to evacuate your premises.
Add Webhook Integrations to send data from Smart Access Management to an external application.
You can record staff activity by exporting a .csv file.
You can view staff activity to see a record of staff sign in history.
You can view visitor activity to see a record of visitor sign in history.
You can record visitor activity by exporting a .csv file.