
SendPro® MailCenter Support
Find solutions
Install & Setup
Using Your Product
Fixing & Maintenance
Postage
Reporting, History & Accounting
Network & Connectivity
Use these network requirements to prepare your IT and local network environment for connecting your SendPro MailCenter to the internet.
The SendPro MailCenter has multiple choices for how to configure your system for connectivity to Pitney Bowes.
Find the answers to frequently asked questions about networking and connectivity for the SendPro MailCenter.
Check the power, signal strength and the connection to resolve connection issues with the SendPro Cellular CD00 (black device).
Clear any errors, check your network settings, and run a network test to resolve connection issues.
Checking the power, reestablishing connection, and improving reception often resolves connection issues when using a SendPro Cellular CDSP (orange device).
Features & Settings
A job is a collection of settings you select and a name that are stored within the system's memory for easy recall. Follow the steps below to create a new job from the Jobs screen on the SendPro® MailCenter.
You may need to make manual adjustments on your SendPro MailCenter before you run a job.
Preview a job to see the settings and an envelope preview on the SendPro® MailCenter.
To clear all changes made while running mail and to return to the default job to its original state, select the Reload job link on the default job tab on your SendPro® MailCenter.
The Application settings allow you to enable tracking services prompts while running mail and to enter or edit the USPS® Mailer ID on your SendPro® MailCenter.
Learn how to reprint a USPS shipping label on the Connect+, SendPro P-Series and SendPro MailCenter
Follow these steps to set the Energy Star timeout on the SendPro MailCenter 1000, 2000, and 3000.
In order to use the 1E03 barcode scanner with SendPro MailCenter, you must program it by scanning a series of barcodes.
Learn how to create a user on the Connect+ 500W, Connect+ 1000, Connect+ 2000, Connect+ 3000, SendPro P1000, SendPro P1500, SendPro P2000, SendPro P3000, SendPro MailCenter 1000, SendPro MailCenter 2000 and SendPro MailCenter 3000.
Use Seal Only mode to seal envelopes without printing anything on the SendPro® MailCenter.
You can restore the external printer connection if the meter is still on, even when the printer has been turned off.
Setting up shipping label printing defaults on the Connect+, SendPro P-Series and SendPro MailCenter
You can select the default print size for shipping labels and whether to print a USPS receipt with each label.
Set the feeder timeouts to specify how long you want the feeder rollers to run for when feeding envelopes through your meter.
You can specify how long you want the default job, screen saver, postage hold and account search timeouts to apply for.
You can set the set the system clock, turn daylight saving on or off and select the appropriate time zone for your meter.
Set up user logins to prevent unauthorized use of your meter.
You can enable or disable the postal information upload warning and set the threshold for when the warning occurs.
You can view the communication settings for your inserting system interface.
You can view your postage account’s connection settings. You can find the IntelliLink settings in the Settings app.
You can view the meter communication settings such as the IP address and Machine ID and export these settings to a USB drive.
If you use user logins and you are a user with operator access, you can change your password or password hint.
You can change the Weigh-on-the-Way mode to obtain a more precise measurement of the weight and dimensions of your mailpieces.
You can set the Weigh-on-the-Way (WOW) weight limit to prevent the system from printing postage on pieces of mail that exceed a set weight.
If your mail is picked up at a set time each day, set your meter to advance the date at that pickup time.
Advance the date to print postage up to thirty days before you need to send it.
Change the envelope size to ensure the meter prints correctly for the size of the envelope you are using.
You can set the number of envelopes or tapes you want to print. The meter counts down and stops automatically after it processes that number of pieces.
You can use the internet and network settings to view your postage account number, communication settings, IP address, initiate remote assistance, inserter communication settings, and perform a network connectivity test.
Change the speed to prevent jamming when feeding mail through the meter.
Add your USPS Mailer ID when you send mail using Electronic Return Receipt (ERR).
You can enable tracking service prompts and enter or edit the USPS Mailer ID while running mail.
You can schedule your meter to check for software updates at a specific time every day.
Use Start Over on the Run Mail screen to quickly reset your meter.
Delete a job when you no longer use this group of settings on your meter.
If your meter uses accounting, you can create a job that weighs, rates, and counts mail without printing postage.
If your meter uses accounting, you can create a job that counts mail without printing postage.
Set the default job to store the most commonly used job on your meter.
Open a job to access the saved settings within that job.
Create a combined barcode label job if you use Electronic Return Receipt (ERR).
Create jobs to store commonly-used settings. Jobs can store settings such as a postage class, an account and a graphic.
A job is a group of commonly-used settings. Jobs can store settings such as a postage class, an account and a graphic.
If you use Job ID's, you select them on the Run Mail screen. Depending on your account settings, you may be required to enter a Job ID 1 and / or Job ID 2 before printing mail.
Select a surcharge in the Run Mail screen to apply a batch surcharge, or a surcharge that is customized for a specific transaction.
You can create global surcharges or apply surcharges to every transaction your meter processes.
Surcharges allow you to add a fee to mail costs during the Accounting or Run Mail processes.
If you use user logins, you need to enter a password to log on to the system. This prevents unauthorized use of the system.
You can set up the optional barcode scanner to help you control how barcodes are scanned, entered, and tested in the meter.
If you get an out of ink warning because your are out of black ink, you can turn spot black (#2) printing off, and can continue to print mail for 14 days before spot black printing is permanently disabled.
If you need to change the ZIP code on your meter, please chat with us first.
Create a manual weight entry job if you know the weight of your mail and are not using the scale.
Use the attached scale if you have mail that is too large to feed through your meter. Create an attached scale job if you use this method on a frequent basis.
Use the vibration filter on if your meter is in a location subject to vibrations, such as near air-conditioning vents, fans or closing doors.
Zero the scale if you have an attached scale and it displays a weight greater than zero when there is nothing on the scale.
Edit the differential weighing threshold to set the minimum weight each mailpiece must weigh before the meter prints your mail.
If you want your meter to weigh the first envelope and then print the same postage on the remaining envelopes, use the WOW, first piece only mode.
If you want your meter to weigh and then print the correct postage on envelopes, use the Weigh-on-the-Way (WOW) mode.
You can choose the most suitable weighing method for a mailing job, including Weigh-On-The-Way (WOW), attached scale, differential weighing, or manual weight entry, then confirm your selection to process mail accurately.
You can create a differential weighing job to process mixed weight mail more efficiently. Your meter calculates the correct weight and price as you remove and print each mailpiece from the scale.
You can change the sealing method for a job while running mail. You can turn the sealer on and off or seal envelopes without printing postage.
You can seal envelopes without printing anything on the envelope.
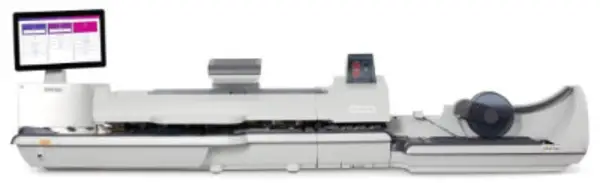
Familiarize yourself with the parts of your SendPro MailCenter.
Review the specifications of your SendPro MailCenter including the throughput, ink cartridge yield, and other component details.
Review the material specifications including the minimum and maximum envelope sizes, envelope stack height, and acceptable envelope materials.
You can view the model and serial numbers of the different parts of your meter. This is helpful for rate changes, software updates and if you need support.
Follow this process to shut your meter down correctly.
Look on your mailing system to find the serial number and Product Code Number (PCN).
Learn how to access the SDS pages online.
Visit the Pitney Bowes online shop to order label rolls or printer ink for your SendPro® MailCenter.
Whenever you enter a US address on your SendPro® MailCenter, you’ll be prompted to verify it
Add an address to the address book to save time when printing shipping labels. Using the address book saves you having to enter each address manually.
Edit or delete shipping addresses directly in the address book.
If you need to edit a sender address, you can edit it while printing a shipping label or in the address book.
You can print a shipping label from within the address book.
Printing
Replace the ink cartridge when the low ink warning appears to ensure your meter is in optimal working condition.
The Received date and time option allows you to print the current time and date, along with the word “Received” on incoming mail. on your SendPro® MailCenter.
Learn how to reprint a USPS shipping label on the Connect+, SendPro P-Series and SendPro MailCenter
Customise your mail by adding a custom logo or graphic.
You can print a test print for any printer connected to your meter.
You can adjust the distance of the graphic from the top edge of the envelope or from the left or right sides of the envelope. By adjusting the top vertical edge, you move all of the printed elements on the envelope up or down.
Print a sample mailpiece to make sure your job will run and that all the printed elements (address, Ad/Graphic etc.) are positioned correctly. There are no charges for printing a sample mailpiece.
Print the date and time to keep a record of when you receive incoming mail.
Customise your mail by adding a custom logo or graphic.
Add a customized text message to print a return address or your own personalized message.
You can print a permit on your mail instead of printing postage. Create a permit job if you use this type of job on a regular basis.
You can create a job that prints only non‑postal elements, such as graphics or text, on a tape or envelope.
Create a date correction job if you need to update the date on your envelopes.
If your mail doesn’t have enough postage, you can print more to make up the difference. Create a postage correction job to apply the extra postage.
Print a test pattern to see if the printheads are working properly or if you have enough ink in the cartridges.
Check your ink level, try another ink cartridge, perform a test print and remove, clean and replace your printhead to resolve poor print quality.
Receiving
The Received date and time option allows you to print the current time and date, along with the word “Received” on incoming mail. on your SendPro® MailCenter.
Mailing & Shipping
A job is a collection of settings you select and a name that are stored within the system's memory for easy recall. Follow the steps below to create a new job from the Jobs screen on the SendPro® MailCenter.
Follow these steps to print postage for a package.
Learn how to run mail with different shapes and weights.
Preview a job to see the settings and an envelope preview on the SendPro® MailCenter.
Learn about USPS requirements for your SendPro® MailCenter.
If you wish to use a pre-printed return envelope, card, or label on which the postage is prepaid, you must print the postage without a date on the SendPro® MailCenter.
You can use USPS Ground Advantage™ service to send packages up to 70 lbs in 2-5 business days on the SendPro® MailCenter.
Follow these steps to display and select the classes and services available on your SendPro® MailCenter.
The Home screen is the first screen displayed when you log onto the system. It contains all of the application tiles you need to start any of the system applications.
Use PitneyShip on your computer to set up a FedEx account.
Learn how to use your own packaging for shipments on the Connect+, SendPro P-Series and SendPro MailCenter
Learn how to add or refill postage to your PitneyShip account on the Connect+, SendPro P-Series and SendPro MailCenter.
To obtain a Certificate of Mailing, print an indicia for Proof of Induction payment on your SendPro MailCenter and attach it to USPS® Form 3817, 3665, or 3606-D.
Make a cost account inactive to prevent anyone from charging shipping label costs against it.
If you need to update the settings of a cost account, you can edit it.
If you are not going to use a FedEx or UPS shipping label that was created, you can void it.
You can view the status of a USPS shipping label refund if required.
You can request a refund up to 30 days from the date on which you first printed a USPS shipping label.
If a shipping label does not print correctly, you can print it again.
You can search for shipments by using the History option.
You can print a shipping label from within the address book.
Print shipping labels to see all available pricing and detailed delivery history for USPS, UPS or FedEx package services.
Use tracking services when printing postage to keep track of your mail during the delivery process.
You can use the combined ZIP Code and Customer Reference Number barcode label as part of an Electronic Return Receipt (ERR) job.
Use Electronic Return Receipt (ERR) if you need evidence of delivery, along with information about the recipient's actual delivery address.
Send E-Certified Mail if you need proof of delivery when using First-Class Mail or Priority Mail.
Send Certified Mail if you need proof of delivery when using First-Class Mail or Priority Mail.
The Run Mail screen is the starting point for printing postage on an envelope or tape. It also lets you change what you want to print.
You can create a USPS return label for a shipment so that the recipient can send it back to you.
Add cost accounts to help you keep track of where you’re spending your money on postage by allowing you to assign shipping label costs.
Enable cost accounts for shipping labels via the PitneyShip web application on your computer where you can also view cost accounts information.
To obtain a Certificate of Mailing, print the Proof of Induction postage information. You must use USPS® form 3817, 3665, or 3606-D for legal proof of mailing.
Network & Connectivity
Use these network requirements to prepare your IT and local network environment for connecting your SendPro MailCenter to the internet.
The SendPro MailCenter has multiple choices for how to configure your system for connectivity to Pitney Bowes.
Find the answers to frequently asked questions about networking and connectivity for the SendPro MailCenter.
Check the power, signal strength and the connection to resolve connection issues with the SendPro Cellular CD00 (black device).
Clear any errors, check your network settings, and run a network test to resolve connection issues.
Checking the power, reestablishing connection, and improving reception often resolves connection issues when using a SendPro Cellular CDSP (orange device).
Printing
The Received date and time option allows you to print the current time and date, along with the word “Received” on incoming mail. on your SendPro® MailCenter.
Learn how to reprint a USPS shipping label on the Connect+, SendPro P-Series and SendPro MailCenter
Customise your mail by adding a custom logo or graphic.
You can print a test print for any printer connected to your meter.
You can adjust the distance of the graphic from the top edge of the envelope or from the left or right sides of the envelope. By adjusting the top vertical edge, you move all of the printed elements on the envelope up or down.
Print a sample mailpiece to make sure your job will run and that all the printed elements (address, Ad/Graphic etc.) are positioned correctly. There are no charges for printing a sample mailpiece.
Print the date and time to keep a record of when you receive incoming mail.
Customise your mail by adding a custom logo or graphic.
Add a customized text message to print a return address or your own personalized message.
You can print a permit on your mail instead of printing postage. Create a permit job if you use this type of job on a regular basis.
You can create a job that prints only non‑postal elements, such as graphics or text, on a tape or envelope.
Create a date correction job if you need to update the date on your envelopes.
If your mail doesn’t have enough postage, you can print more to make up the difference. Create a postage correction job to apply the extra postage.
Print a test pattern to see if the printheads are working properly or if you have enough ink in the cartridges.
Check your ink level, try another ink cartridge, perform a test print and remove, clean and replace your printhead to resolve poor print quality.
Replace the ink cartridge when the low ink warning appears to ensure your meter is in optimal working condition.
Errors & Troubleshooting
Follow these steps to clear a tape jam on the SendPro MailCenter system.
Learn how to resolve envelopes not feeding on your SendPro® MailCenter.
Learn how to resolve a frozen screen on the SendPro MailCenter.
The new USPS Ground Advantage™ new service combines the services formerly known as USPS Retail Ground®, First-Class Package®, and Parcel Select Ground® on the SendPro® MailCenter.
Learn how to resolve a black or blank screen or a screen in power saving mode on the SendPro MailCenter.
If accounting reports do not print, check the printer is connected to power and the on the SendPro MailCenter®, check the printer is not out of paper, jammed or out of toner.
Reboot your SendPro MailCenter if you see the message "Loading Job" but the job doesn't run after you press Start.
Check the power, signal strength and the connection to resolve connection issues with the SendPro Cellular CD00 (black device).
If your envelope(s) are not sealing or not sealing properly on your SendPro® MailCenter 3000, perform the recommended maintenance operations here.
If your envelope(s) are not sealing or not sealing properly on your SendPro® MailCenter 2000, perform the recommended maintenance operations here.
If your envelope(s) are not sealing or not sealing properly on your SendPro® MailCenter 1000, perform the recommended maintenance operations here.
If your SendPro® MailCenter has an E-Z Seal® solution leak, check to ensure that the solution bottle cap is tightly closed and that the cap's valve springs back up when pressed.
If you experience envelope jams in the Weigh-On-The-Way® (WOW®)/Shape Based Rating section of your SendPro® MailCenter 2000, follow the steps here to clear the jam and perform the recommended maintenance operations to prevent further jams.
Learn how to resolve the message "Balance Too Low" or "Insufficient Funds" on the Connect+, SendPro P, SendPro C, SendPro MailCenter, SendPro Mailstation, and PitneyShip.
Learn how to resolve a frozen screen on the SendPro MailCenter.
Open and close the ink cover door if your SendPro MailCenter displays a false "out of ink" message.
Check the label printer is on and has labels installed, ensure the correct label size is correct, refresh the printer connection to the meter and restart the meter to resolve the No printer detected message.
Clear any errors, check your network settings, and run a network test to resolve connection issues.
There may be an issue with the moistener assembly or the envelope flaps may require extra pressure to be applied to ensure they are sealed sufficiently.
The Out of Ink warning displays when there is not enough ink left in the cartridge for your mailing system to print, and the system stops printing. In order to resume printing you must replace the ink cartridge.
Pleased chat with us to resolve error 102.
See your Client Administrator to have accounts added or removed from your device if the message "This postage meters cost accounts are managed using the Pitney Bowes Shipping 360 platform. Sign-in to your subscription to manage the cost accounts for this meters location" appears.
If you see the message "Update your USPS Shipping Account Details", the address that is saved in your profile does not meet the USPS requirements or no longer matches your USPS shipper ID.
Reboot your meter if error 03114100D5 "Failed to print" appears.
Clear the error, remove any paper jams and reboot your meter to resolve error 0418420021 "Printer motion sequence failure".
Use genuine Pitney Bowes ink, ensure you install the ink cartridges properly and reboot your meter to resolve ink supply and printhead errors.
Remove and then replace the printhead to resolve printhead communication errors.
Check there is sufficient sealing solution and that the sealant bottle is correctly fitted to resolve the Out of E-Z Seal message.
Maintenance
Ensure you feed envelopes correctly to help prevent feeding problems on the SendPro MailCenter 1000, 2000, and 3000.
Follow these steps to clear an envelope jam on your SendPro® MailCenter 1000.
If you experience envelope jams on your SendPro® MailCenter 1000, follow the steps here to clear the jam and perform the recommended maintenance operations to prevent further jams.
If you experience envelope jams on your SendPro® MailCenter 2000, follow the steps here to clear the jam and perform the recommended maintenance operations to prevent further jams.
Follow these steps to clear an envelope jam on your SendPro MailCenter 2000.
Follow these steps to clear an envelope jam on your SendPro® MailCenter 3000.
If you experience envelope jams on your SendPro® MailCenter 3000, follow the steps here to clear the jam and perform the recommended maintenance operations to prevent further jams.
If you experience envelope jams in the Weigh-On-The-Way® (WOW®)/Shape Based Rating section of your SendPro MailCenter 3000, follow the steps here to clear the jam and perform the recommended maintenance operations to prevent further jams.
Follow these steps to clear a tape jam on the SendPro MailCenter system.
Learn how to resolve envelopes not feeding on your SendPro® MailCenter.
If you experience envelope jams in the Weigh-On-The-Way® (WOW®)/Shape Based Rating section of your SendPro® MailCenter 2000, follow the steps here to clear the jam and perform the recommended maintenance operations to prevent further jams.
Replace the tape roll in the meter when a red stripe appears.
Replace your label roll if your shipping printer label roll is empty.
You may need to replace a printhead when the existing printhead is producing poor print quality.
You can clean the printheads at any time to ensure optimal print quality on your SendPro MailCenter.
Refill the sealant bottle when the E-Z Seal® is running low.
Print a test pattern to see if the printheads are working properly or if you have enough ink in the cartridges.
If you turned off spot black printing, once you replace the black ink cartridge during the grace period, reactivate spot black printing from the Run Mail screen.
You can change the sealing method for a job while running mail. You can turn the sealer on and off or seal envelopes without printing postage.
You can seal envelopes without printing anything on the envelope.
Refilling Postage
The SendPro MailCenter funds report gives a summary of the funds used and available in the meter, total pieces run, and piece count.
The Refill Summary report provides a history of the last 5 refills performed on your SendPro® MailCenter system.
Learn how to add or refill postage to your PitneyShip account on the Connect+, SendPro P-Series and SendPro MailCenter.
Print reports or receipts to view postage activity, account balances, refill details, package tracking records, and meter usage information, including reprints of your most recent refill receipt.
Upload postal information to send all the information within the pieces run through the meter.
Set the low funds warning to alert you when your available postage balance drops to a chosen amount. Change the default refill amount to store an amount you want to refill your device with.
View the Last 5 Refills to quickly see the date, time, amount, and, if enabled, the user who performed each of the last five postage refills.
You can find your PB Postage account number within Settings on the Home screen.
View the funds information to monitor and manage postage funds, view postage refills, set postage refill values, upload postal information and view meter information.
Before refilling your meter, you should check the funds available through your postage account.
Add or refill postage for your postage balance as soon as you receive a message that your funds are getting low.
Learn how to resolve the message "Balance Too Low" or "Insufficient Funds" on the Connect+, SendPro P, SendPro C, SendPro MailCenter, SendPro Mailstation, and PitneyShip.
Rate Change
The system automatically updates postal rates and software.
Use the configuration screen to view your meter rates and software status.
You can view a list of the rates and software updates that have been installed on your meter.
You can schedule your meter to check for software updates at a specific time every day.
Check for postal rates or software updates to ensure that you are printing accurate postage.
The new USPS Ground Advantage™ new service combines the services formerly known as USPS Retail Ground®, First-Class Package®, and Parcel Select Ground® on the SendPro® MailCenter.
Reporting, History & Accounting
If you use accounting, your meter can track mail runs by Job IDs. Job IDs let you group and track categories that span multiple account names.
Upload postal information to send all the information within the pieces run through the meter.
View account reports to keep a record of how much individuals or departments have spent on their postage over specific time periods.
Set your reporting period before generating accounting reports.
Use the account report period calendar options to suit calendar months of differing lengths.
You can delete an account report if it is no longer required.
Print account reports to show how you spent your postage for a specific account or for all accounts over various time periods.
Export an accounting report to view the report from your computer. Accounting reports can be exported to a USB drive in .csv, .xls and .pdf formats.
You can save a copy of an account report and rename it.
You can email an account report to keep a record of how much departments or clients have spent on their postage over specific time periods.
View or print the daily snapshot report to give you a quick summary of the day’s accounting.
You can protect each account from unauthorized access by turning account passwords on.
You can delete a transaction filter if you no longer require it.
You can edit transactions to changing the account a transaction was processed against.
You can view your accounting transactions to track postage spend, review activity, and manage accounting records.
Create a transaction filter to view specific transactions during a certain date range or view specific account transactions.
Every time you change a job setting like an account, class or weighing method this is classed as a new transaction.
If you no longer need an account, you can delete it. You can only delete an account if it has no transactions linked to it.
Make an account inactive to prevent anyone from charging postage against it. You cannot select the account if the status is inactive.
Edit an account when you want to change the account name, code, description, status or password.
If you use accounting, you can search for an account using the account search field.
If you use accounting, you can customize which columns appear on the Select Account screen and arrange them in any order you prefer.
Set your meter to display only accounts that are unlocked. Unlocked accounts don’t require a password.
If you use accounting, you must select an account in order to print mail.
You can create an account to track your costs for printing postage. This is different from your Pitney Bowes account which is used to fund your postage and shipping labels costs.
You can use the accounting feature to track the postage that departments or individuals within your organization use.
You can view and generate cost account reports for printing postage with options to customize, view, export, email, or print report results.
The SendPro MailCenter funds report gives a summary of the funds used and available in the meter, total pieces run, and piece count.
The Refill Summary report provides a history of the last 5 refills performed on your SendPro® MailCenter system.
Print reports or receipts to view postage activity, account balances, refill details, package tracking records, and meter usage information, including reprints of your most recent refill receipt.
If accounting reports do not print, check the printer is connected to power and the on the SendPro MailCenter®, check the printer is not out of paper, jammed or out of toner.
Documents and Software
For information on service offerings and level of support, download the Pitney Bowes Technical Support Overview